Paper Door: Let It Snow + Spritz Background
It’s been freezing here in San Antonio over the last couple of days. LITERALLY. I had to cover my plants and buy the dog a sweater just so she’d go outside (she’s a boxer, so she hasn’t got much of a coat to keep her warm). It really puts me in holiday project mode, though.
Deep down I would love for it to snow just a little bit; I probably won’t get my wish granted this far south, but that doesn’t mean I can’t stamp some wintery scenes, like today’s card.

This is an excellent project if you’re just starting out with shimmer mists and you find the unpredictability a bit intimidating. You can always pull your reindeer off and try your background again 🙂

I colored the cute little reindeer with Copic Sketch markers in E04, E23, and E25 before I die cut him and popped him up on the card front with foam circles. Isn’t he sweet?
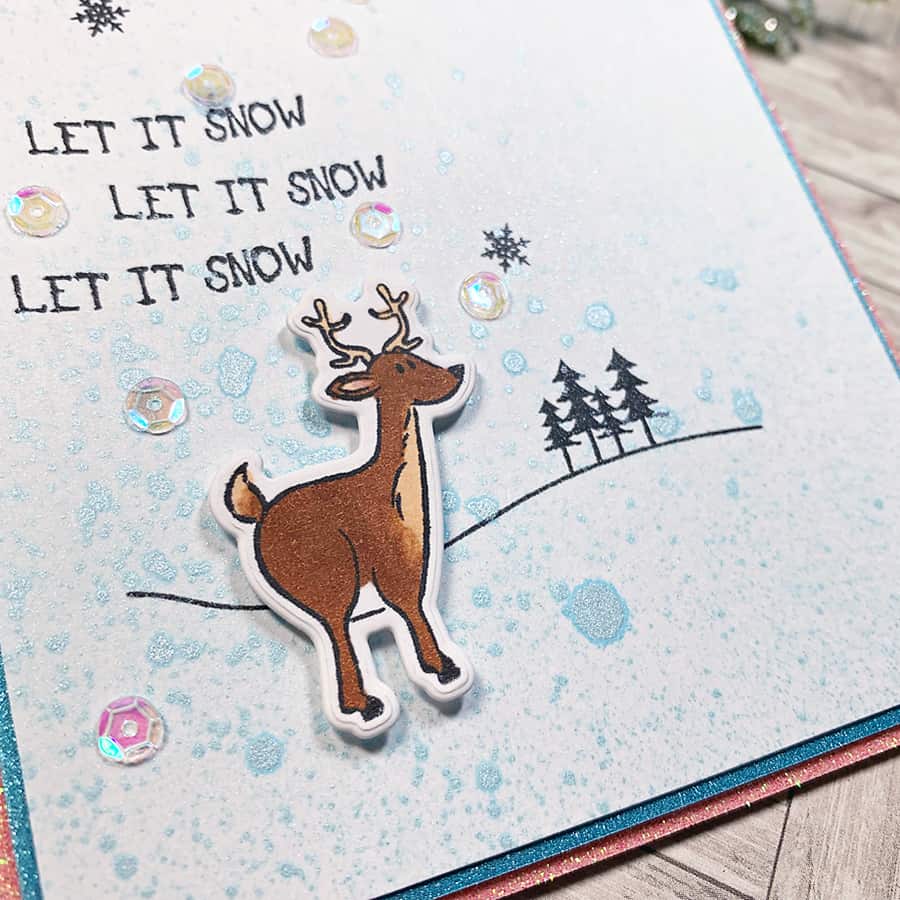
Here’s the step by step instructions (with measurements!) for you.
Cardstock Measurements:
- White Card Base – 5 1/2 x 4 1/4-inch
- Pink Glitter Cardstock – 5 1/2 x 4 1/4-inch
- Blue Glitter Cardstock – 5 3/8 x 4 1/8-inch
- White Cardstock – 5 1/4 x 4-inch
Step by Step Instructions:
- Make an A2 card base from white cardstock.
- Cut all other cardstock pieces and layer blue over pink as shown. Then, adhere these panels to the card base with glue tape. Set aside.
- Spritz white cardstock layer in lower left corner with Fireworks!. Allow to dry.
- Meanwhile, stamp reindeer with Memento Ink. Die cut and color reindeer with Copic markers.
- Stamp hillside, trees, and snowflakes with Memento Ink.
- Stamp sentiment three times as shown with Memento Ink.
- Adhere reindeer with foam circles.
- Attach white cardstock to card front with glue tape.
- Add sequins to card front, adhering with Glossy Accents.
Happy crafting!
