CardMaker Magazine & CAS-ual Fridays Stamps Blog Hop
Welcome! I hope you’re having fun on the CardMaker Magazine & CAS-ual Fridays Stamps Blog Hop. You should have gotten here by way of Nora’s blog, but if you’ve gotten lost be sure to head back to the beginning here, so you don’t miss a thing!
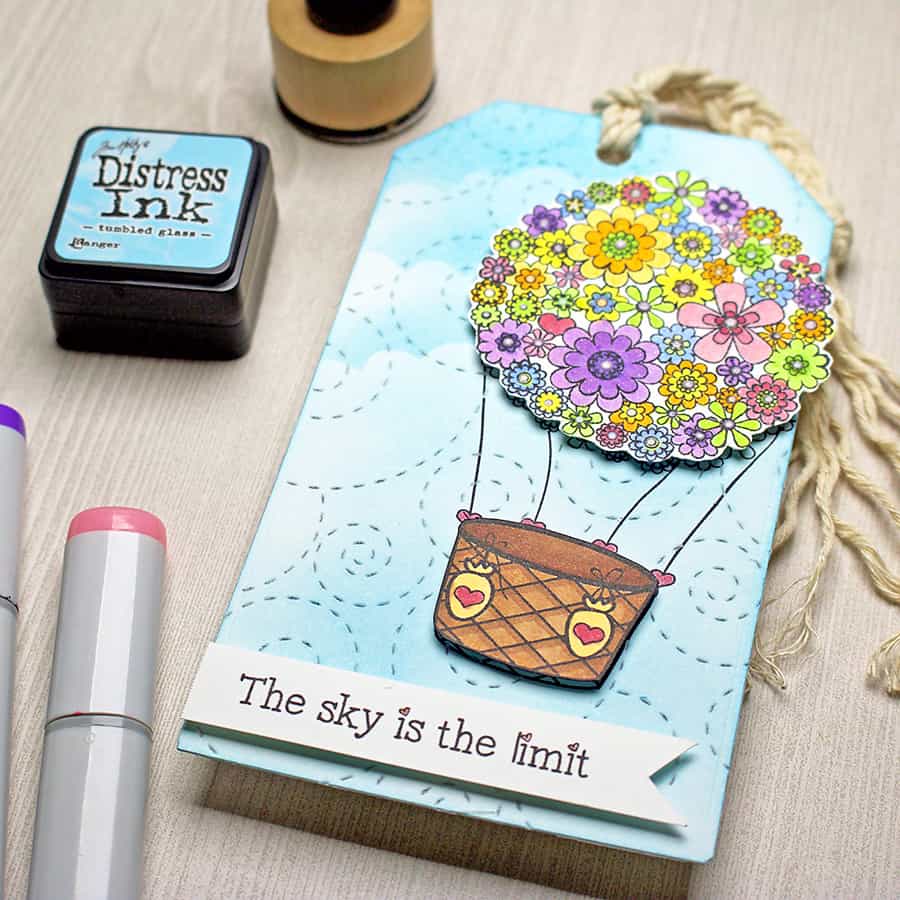
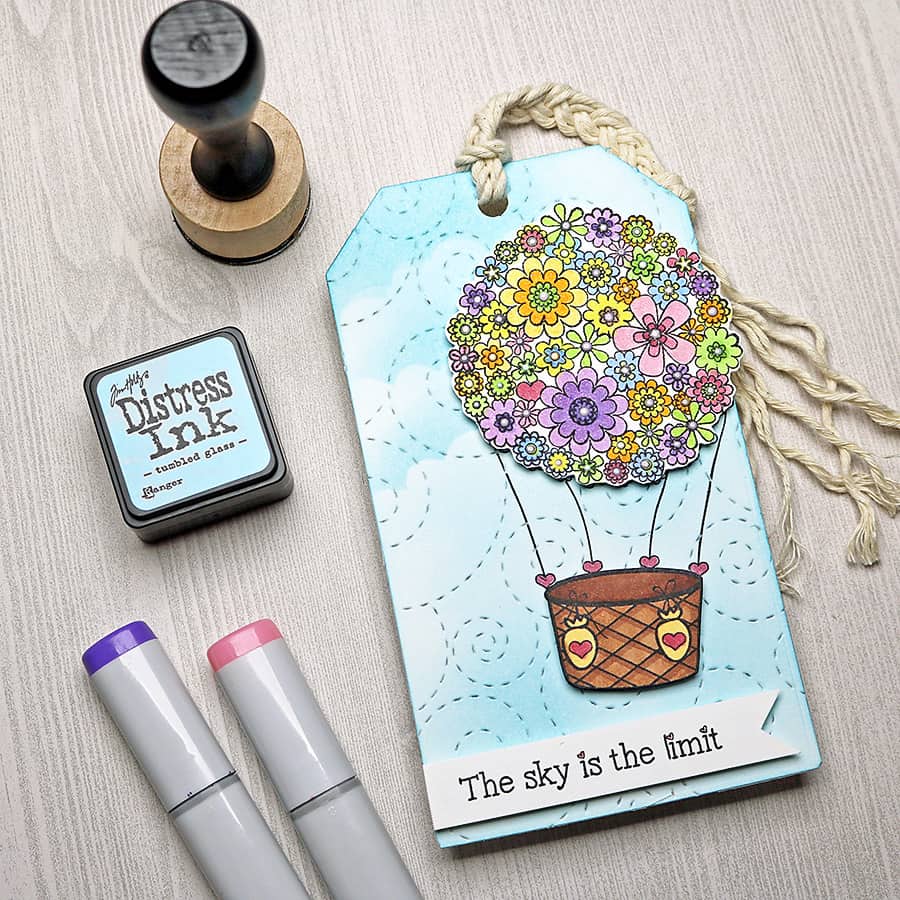
Today I made a lovely tag for you with a CAS-ual Fridays Stamps Set called Floating. They were generous enough to send it along especially for this post, and I tell ya, I was SO happy! I didn’t have any stamp sets with hot air balloons, and I couldn’t wait to take this one for a test drive 😃
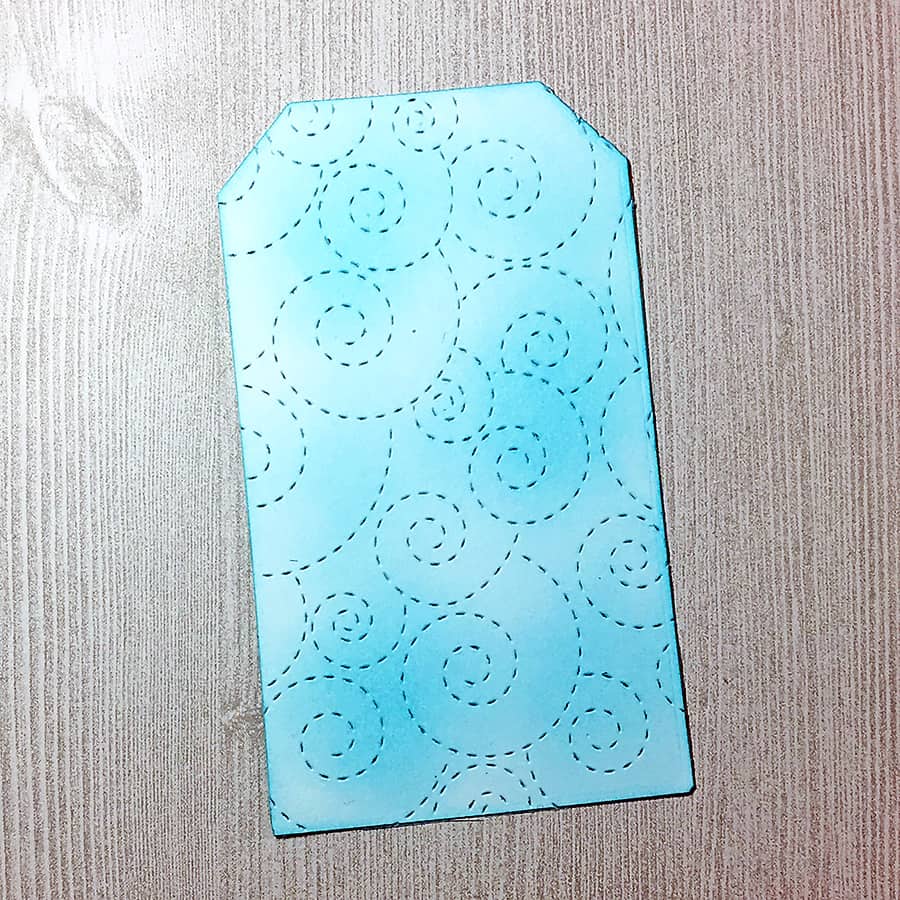
The tag I used is about 5.25 x 3-inches. It was cut with a basic tag die I have in my stash. To add some color to it, I blended in Distress Ink in Tumbled Glass from the edges. After that, I ran it through my Big Shot to add the stitching design with a plate die.
Next, I stamped the hot air balloon image onto a scrap piece of White Cardstock and colored it with Copic Markers.
Then, I stamped the image where I wanted it to be on my tag. That’s when I realized I needed a few clouds. It’s easy to add them – cut a cloud shape from some scrap paper and blend your Distress Ink downward over it.
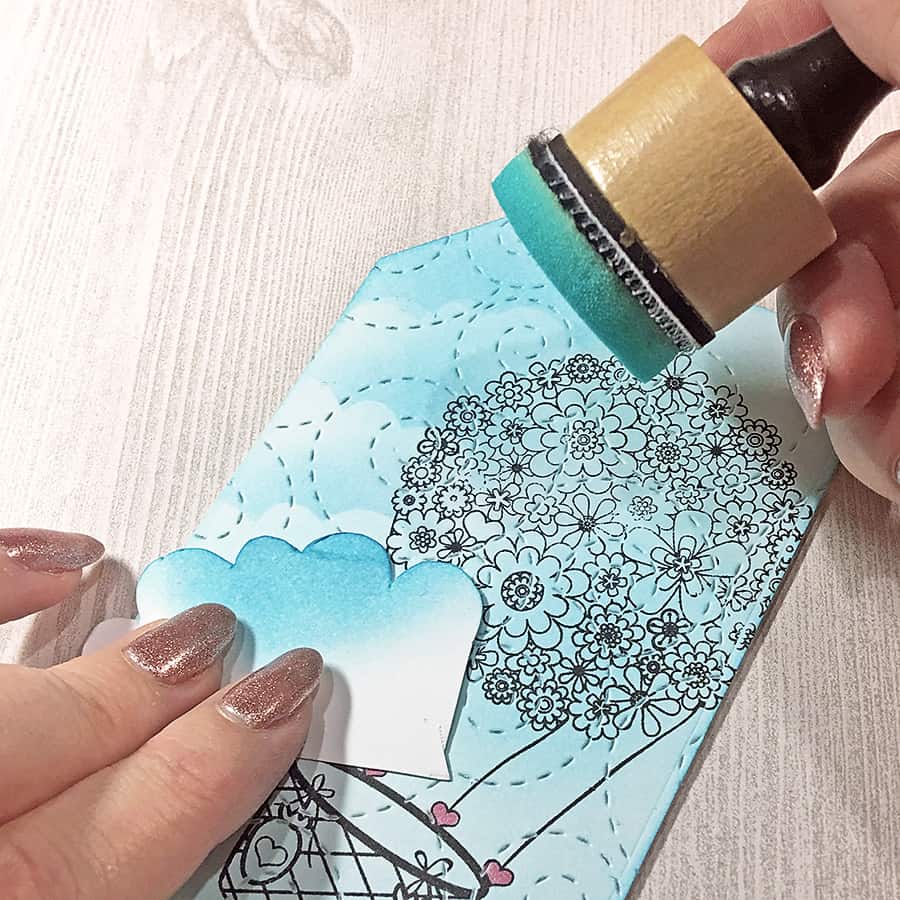
The hot air balloon itself is stunning – its shape is a bouquet of flowers, and it was so much fun to color.
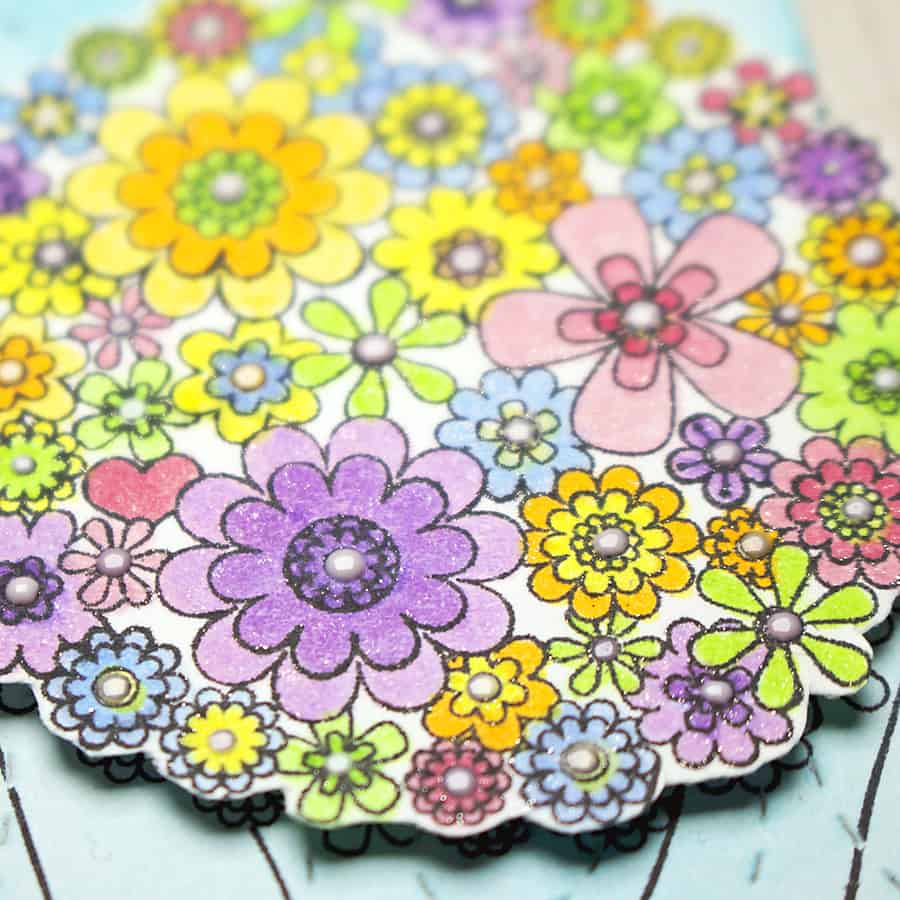
I added some Tsukineko Sparkle Spritz over the flowers and dabbed the centers with Nuvo Crystal Drops in White.
To put the tag together, I fussy cut the colored hot air balloon image and adhered the balloon and basket separately to my tag with foam adhesive. Then, I stamped the sentiment onto some scrap white cardstock with Memento Ink in Tuxedo Black, flagged the end and attached it with foam adhesive as well.
To finish off my project, I threaded some cord through the punched hole up top, then separated and braided it to make a tassel.
On to your next stop on the CardMaker Magazine & CAS-ual Fridays Stamps Blog Hop! Click here to visit Shona’s blog for more great project ideas.
Don’t forget to take part in the giveaway at the CAS-ual Fridays Stamps Blog. They have four prize packages up for grabs, and you know you can’t win if you don’t play 😉
Happy hopping!

What a terrific tag with that fabulous flowered balloon!!
This is too cute! I love the stitched background and the colorful balloon 🙂
Thank you Elise!
Awesome card, I love the whimsical balloon!
Me too – this is probably my new favorite stamp set 🙂
What a fun tag!
Aw, thank you, ma’am! 🙂
Beautiful tag ! I love that the balloon is partly flying off the tag – it gives it something extra. The added clouds are great as wel, as is the stitching design in the background. The rope is the fnishing touch. A happy, colourful project !
Greetings from Belgium.
Thank you! I’m so glad you liked it, Lieve!
I love hot air balloons and the
flowers make a beautiful balloon.
The clouds in the background of
the tag is a great idea.
thanks for sharing a wonderful
tag.
Hey, Miss Mary! Thank you for your kind words. I love all your work!
Such a sweet scene!
Thanks, Lisa! It was fun to put together 🙂
Awesome tag with a pretty sky and hot air balloon! Love the colors and textures!
Thanks, Denise!
I LOVE your tag. How inspirational, your application of the background floral stamp. So imaginative. Great!
Aw, thank you Mary Beth! That means a lot to me 🙂
Love the cloud background for this fabulous floral hot air balloon.
Thank you, Sue!
This is awesome… So soothing
I’m glad you liked it Anila! 😀
Wow! It’s so gorgeous!!! Really adorable!!!
Thank you! I’m a sucker for floral anything 🙂
I really love what you did with the floral balloon image. Wow! Just gorgeous. That looks like something to add to my wish list! Thanks.
Thank you, Barb! It’s a super nice stamp set, for sure 🙂
PRETTY tag….Love the coloring of the stamped image plus that tag has the coolest background.
Thanks Beverly! I’ve been waiting to try out that background combo for awhile now and this tag was the perfect project for it 🙂
Niki, you totally got me on this one…I am a tag LOVER and I have loved this stamp since I first saw it! AMAZING tag! P.I.N.N.E.D! TFS!
Woohoo! Thanks, Teresa!
Such a cute tag..love all the details..
Thank you for your sweet comment, Deepti!
Absolutely gorgeous! And thank you for the detailed instructions!
Sure thing! I always feel weird trying to explain something without a visual aid… probably because I’m a visual learner myself 😀
This has the WOW factor! I’m so inspired by this project. That balloon is FAN-TAS-tic! Thanks for the tutorial, and Gosh! You even braided that ‘string’. So many tips. Thanks.
My pleasure! I’m so glad you liked it! 🙂
Beautiful tag. Great coloring and fantastic background!
You’re so kind – thank you!
What a gorgeous hit air balloon! And the coloring individual flowers is just beautiful! Great project!
Thank you Carolyn! I tried to color with regular markers at first, but nothing beats the smooth lay-down of those dang Copics! 😀
Ooh, love that stitched background and the floral balloon is so cool. Hugz
You’re so sweet! Thank you! 😀
Great Tag! Love the sparkle on the flowers!
Thanks Diana!
This is so creative and fun! What could be happier than a floral hot air balloon soaring through a bright sky. Thanks for the photo tutorial!
Sure thing, Christine!
This is so pretty and so so fun!
I’m so glad you like it, Kirsty! *highfive*
Fantastic card! So much detail!
Thank you, Avra!
I think this is stunning! Lovely coloring of the flowers and the sky is perfection. Awesome fussy cutting, too. lol Love the braided cording, too.
Thank you Becca!
Love your tag. This is the prettiest hot air balloon I’ve ever seen!
It’s a beautiful image, isn’t it? I wish I could think of drawing something that intricate!
Love this!
Thanks, Brooke! 🙂