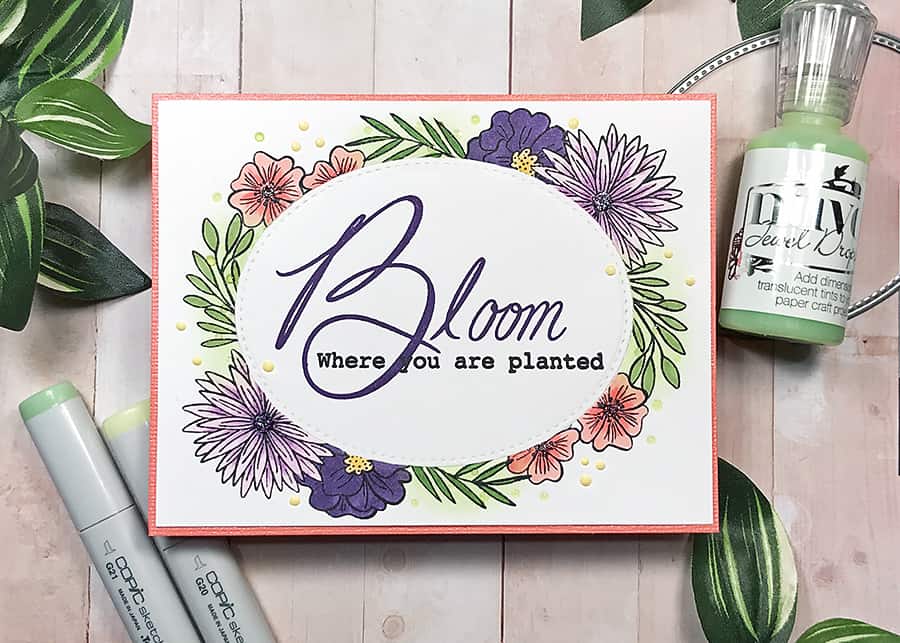
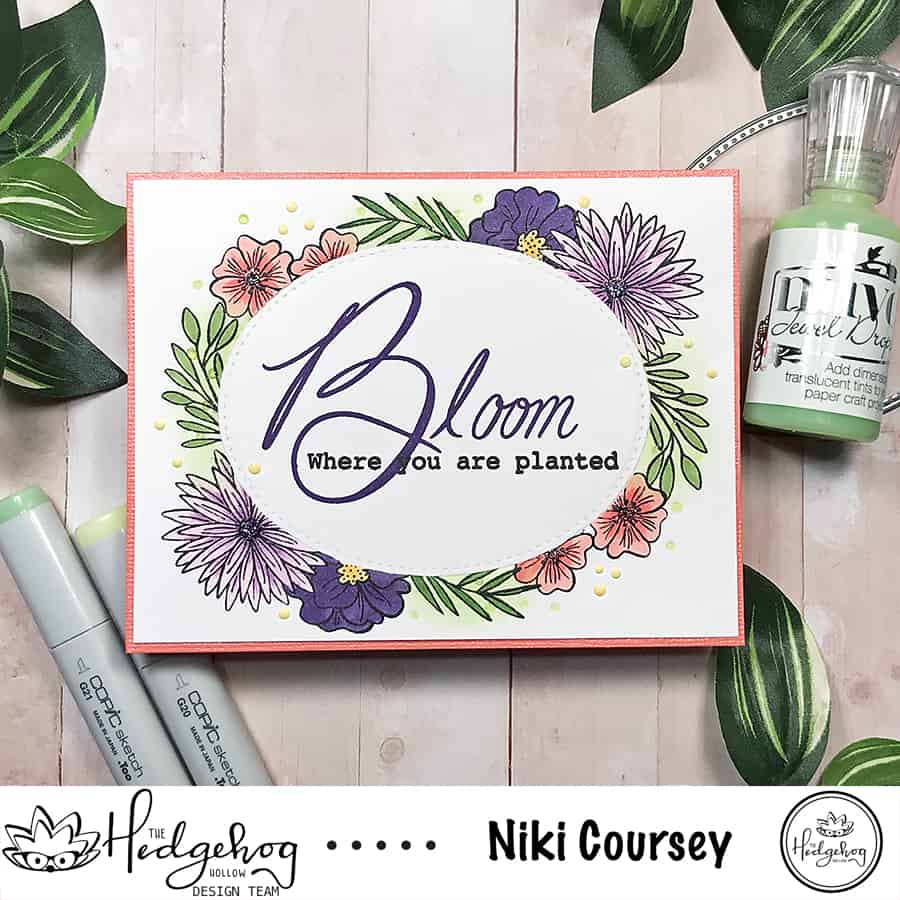
Bloom Where You Are Planted + Stamp Masking
Hello! Today is my very first post for The Hedgehog Hollow Design Team. Pretty exciting, huh?!
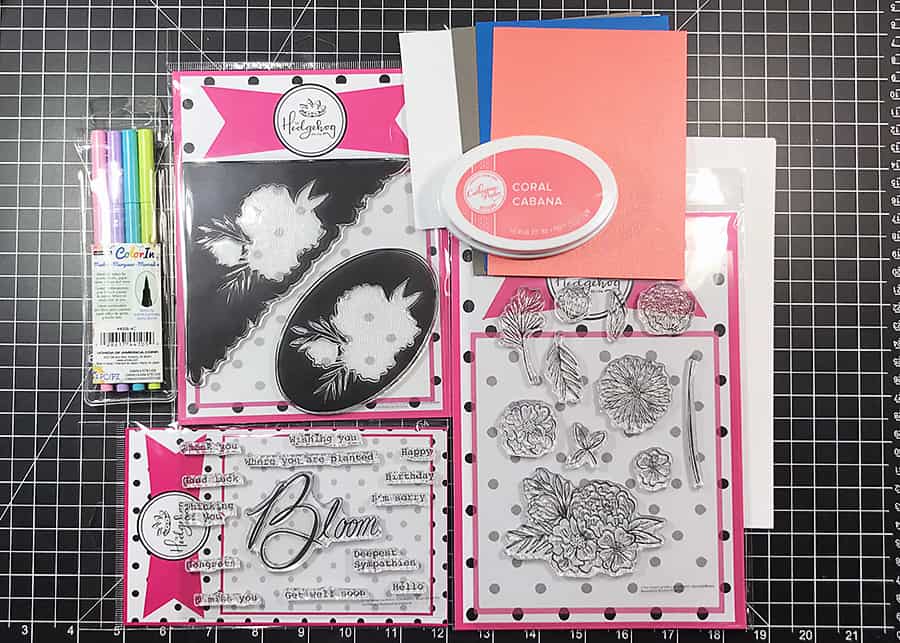
Before anything, I have to tell you that the goodies that came in the September subscription box are GORGEOUS. I might be a bit biased, though, since the stamp sets include my most favorite saying (which is the one I used for the card today).
I’m a sucker for floral stamp sets, too so you can imagine my glee when the mail lady dropped this off at the house:
I’ll have a crafty VIDEO for you next week, but today I have a photo tutorial on how I made the floral frame for this lovely card.
Masking to Make The Frame
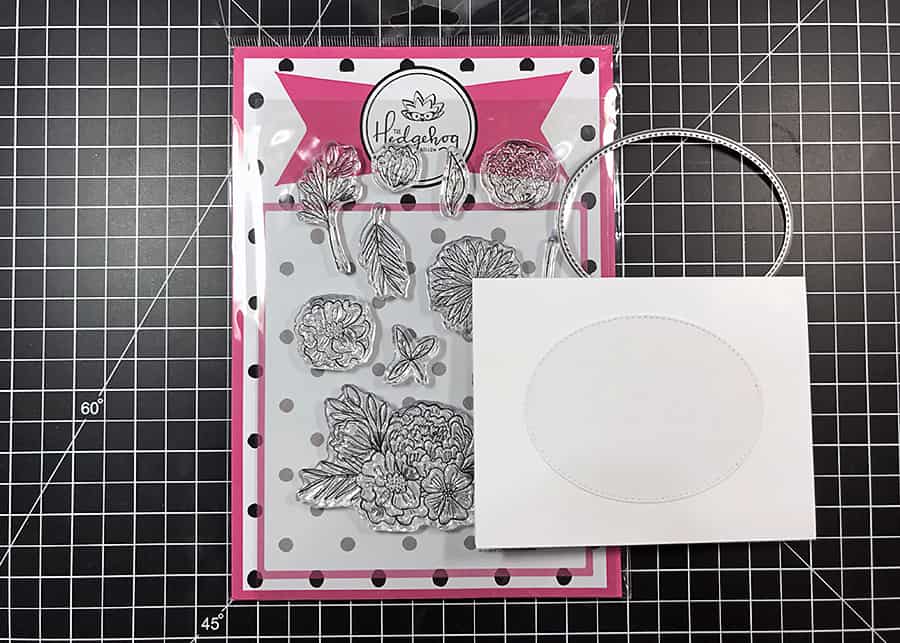
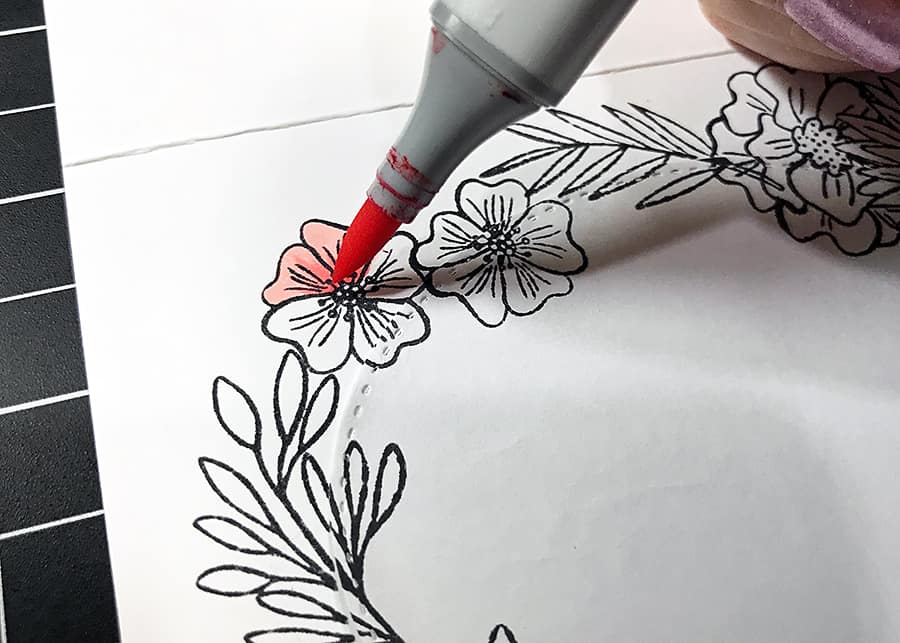
I used a Stitched Oval Die to cut an oval out of some masking paper and stuck it to a 4 1/8-inch x 5 3/8-inch piece of white cardstock. To make the floral frame, I chose a few images from the Bountiful Blooms set.
Now to get a good frame, you need to make sure your flowers are overlapping all around the edges of your masked area. For the larger flowers on this card, I stamped an extra one onto some scrap masking paper and fussy-cut it out. That way I could add more images close to it without worrying about overlapping lines.
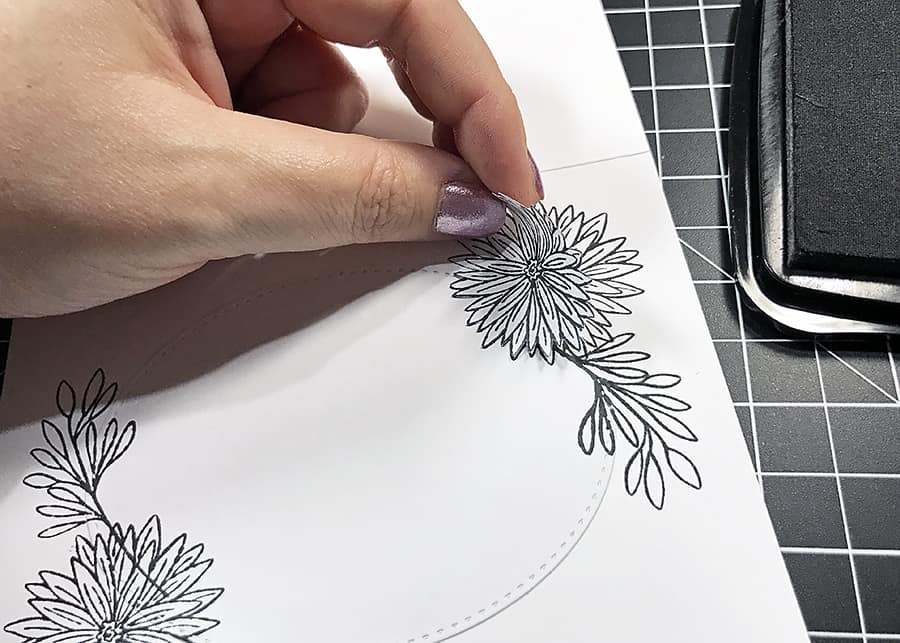
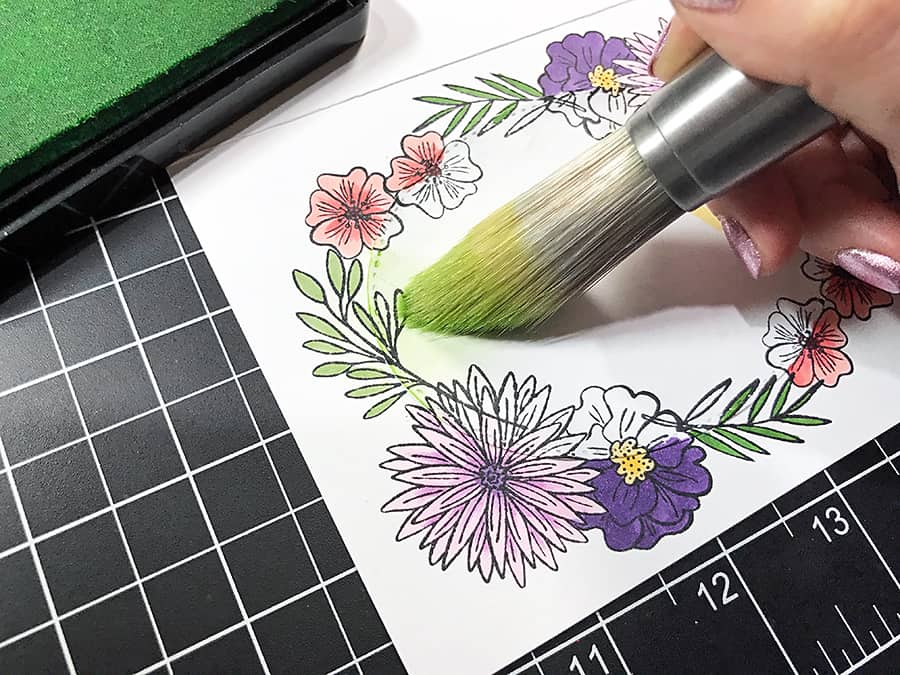
Continue all the way around the oval until there’s no more room for flowers and leaves. Don’t worry too much if you have a couple of gaps; you can fix that with some ink blending. More on that in a minute.
I colored my design with Copic Sketch markers (with the mask still on for crisp lines). Here’s the list of the colors I used:
- Large Flowers: V000, V15, V17
- Purple Flowers: V17 with Y32, Y35 for centers
- Pink Flowers: R20, R22, R59 for centers
- Round Leaves: YG63
- Pointy Leaves: YG67
Here’s the part about the gap fix – once you have all the flowers colored, use your favorite ink blending tool to buff some color in areas that seem a little sparse. For me, that was around the leaves since the flowers did a good job covering most of the edge. I like the Nuvo Stencil Brushes for blending ink; it takes a little more time, but the smooth blend is worth it.
The Reveal and Finishing Up
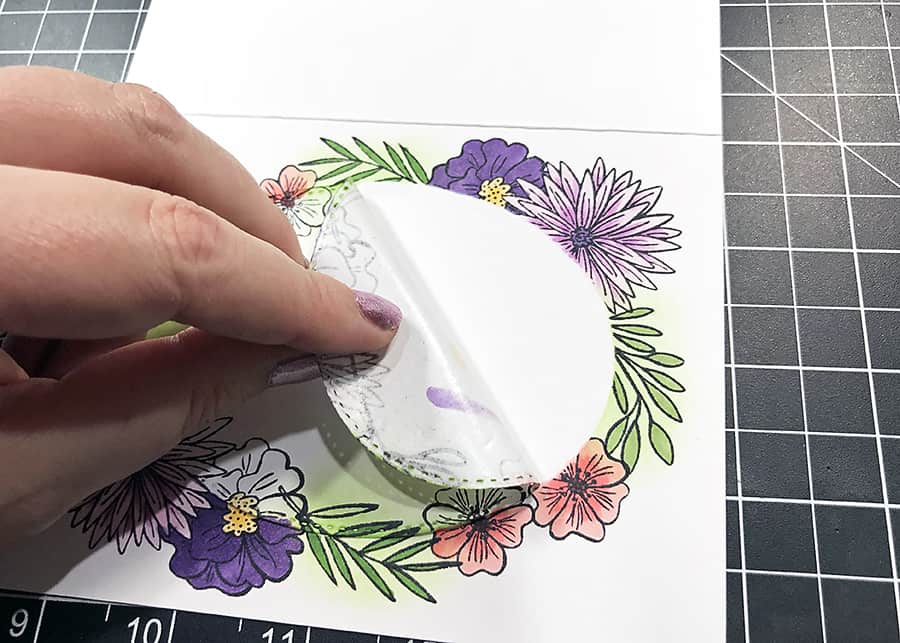
With all the blending and coloring done, it’s time for the fun part – peeling up the mask to see how it came out! It’s like opening a gift at Christmas, I tell ya.
From there, I stamped the sentiment (from the Bloom Where You Are Planted set) using Versafine CLAIR in Nocturne and Monarch. Using the same die I used to cut the masking paper, I embossed the oval with my die cutting machine and a rubber mat.
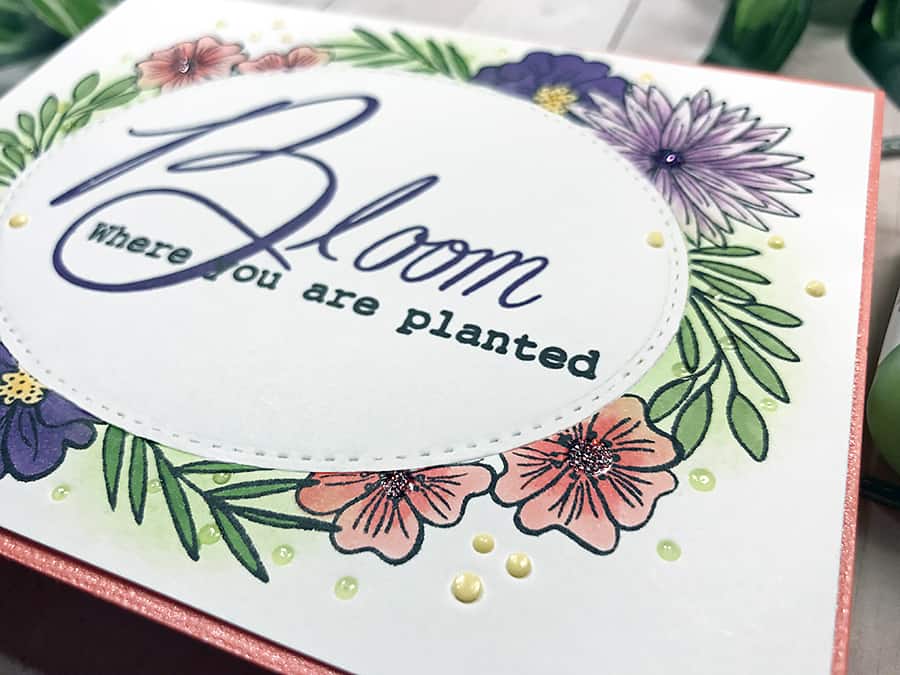
And to finish off the design, I dabbed around the florals with a couple of different colors Nuvo Crystal Drops and set it aside to dry. Full disclosure here: before I popped it onto an A2 card base, I decided to mat the card front with the piece of glimmery coral cardstock that came in the September box. So pretty!
Thank you so much for stopping in to read today! Why not visit & follow me on Instagram? A little bird told me there might be a 10% off coupon to The Hedgehog Hollow posted there…
Love all your pictures and descriptions…Great post and beautiful card!
So soft & pretty! Beautiful creation Niki and what an awesome stamp set! Thanks for sharing the inspiring details!
Thanks, Darlene! 🙂